What Is The Tattoo Removal Cost In Orlando?
People love tattoos because they enjoy the unique way they help them express themselves. But sometimes you might not connect with your tattoo’s meaning anymore or change your mind about it. The solution is a tattoo removal procedure. Fortunately, Orlando provides a variety of options for people looking for tattoo removal services. Let’s get to know about the cost of tattoo removal in Orlando, as well as the best tattoo removal methods, permanent tattoo removal, and removal of minor tattoos.
Understand How Tattoo Removal Works
The purpose of tattoo removal is to get rid of unwanted tattoos. There are various options, including saline tattoo removal, laser removal, dermabrasion, and surgical excision. Saline tattoo removal is a method that is gaining popularity because it is a natural, non-laser solution used for tattoo removal. Saline tattoo removal is a technique that involves fading or removing unwanted tattoos with a saline solution. To help in the breakdown of the tattoo pigments, the saline solution is inserted into the skin and the pigment slowly rises to the top through osmosis. For larger tattoos, multiple sessions might be needed. However, for small tattoos, you may need only one session.
Tattoo Removal Cost in Orlando
The price of tattoo removal in Orlando depends on a number of elements, including the –
- Tattoo size
- Color
- Complexity
- Location
- Number of sessions needed for full removal
In Orlando, the typical price for tattoo removal sessions can be between $100 and $500.
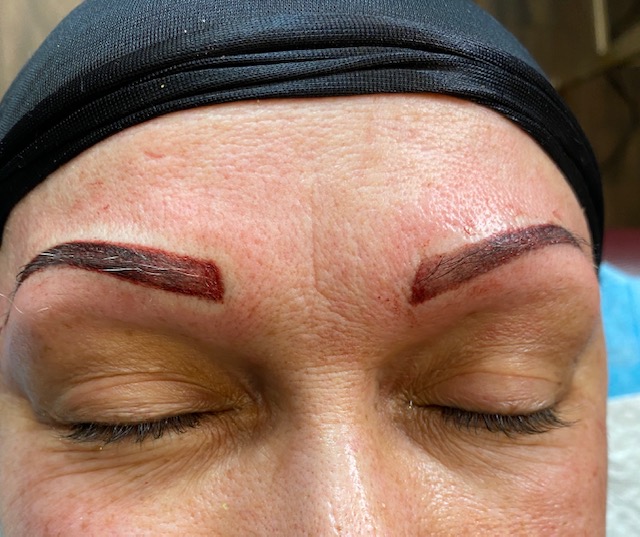
Eyebrow Tattoo Removal in Orlando
Eyebrow tattoos have become common as a semi-permanent way to improve the appearance of brows. But, if you want to remove an existing tattoo to get another eyebrow tattoo or simple want to remove it, the removal of an eyebrow tattoo in Orlando takes careful thought due to the sensitive nature of the area,.
In Orlando, removing an eyebrow tattoo normally costs $150 to $300 per appointment.
Permanent Tattoo Removal in Orlando
Permanent tattoo removal helps you get rid of your tattoo completely. Even though total tattoo removal might not always be possible, saline tattoo removal helps slowly fade the tattoo.
Permanent tattoo removal in Orlando may cost between $200 and $800 per session. The cost will vary according to the tattoo’s complexity and size.
Small Tattoo Removal in Orlando
Compared to larger tattoos, smaller ones are usually easier and quicker to remove. Small tattoo removal in Orlando normally costs between $100 and $300 per session, which is less expensive. The overall price could still change, though, depending on how many sessions are necessary for full removal.
A tattoo removal decision must be carefully considered. In Orlando, there are many choices for tattoo removal services, including brow tattoo removal, permanent tattoo removal, and minor tattoo removal. The tattoo removal cost in Orlando varies according to your tattoo.
Remember to speak only with trustworthy qualified experts so that you can experience a safe and smooth procedure. Keep in mind that tattoo removal is an investment in getting a new start and a canvas free of ink.
What to Do After Getting Lip Blush Tattoo
You got your lip blush tattoo and want to take care of your precious lips in the best way possible. Aftercare is a very important part of lip blushing. Once you have had your lip blush procedure done, following the right aftercare routine is important to properly heal, preserve the color vibrancy, and enjoy your new appearance. Let us share with you the important steps of full lip blush treatment aftercare in detail.
1.Make Sure to Keep Your Lips Clean
Keeping your lips clean is extremely important even with natural lip blushing. It helps in avoiding infection and speeding the healing process.
- Use a mild, fragrance-free cleanser to gently clean your lips, or you can just rinse them with warm water.
- Let them air dry or pat them dry with a fresh, soft cloth.
2.Apply a Healing Ointment:
Apply a thin coat of the healing ointment that has been advised by your makeup artist. This cream will keep your lips moist and help the healing process. The ointment of choice is Burt’s Bees Wax. Keep the lips heavily hydrated.
- This ointment will ease any discomfort, reduce dryness, and stop scabs from forming.
- Choose a product that has been specially recommended by your makeup artist because they are aware of what might work best for you.
3.Do Not Touch or Pick at Your Lips:
During the healing process after full lip blush, stop yourself from touching or picking at your lips. This can lead to a bacterial infection, which can delay the healing process.
- Touching the tattooed region can result in color loss and other risks such as infection.
- Leave the natural healing process alone so it can heal quickly.
4.Avoid Exposing Your Lips to Sun:
The color of your lip blush tattoo can fade in the sun, and it can also make the healing process more difficult.
- Don’t expose your lips to sunlight.
- When you need to go outside, wear a wide-brimmed hat or apply lip balm with SPF.
- There is also lip sunscreen available for further security.
5.Drink Plenty of Water:
The skin of your lips and your overall health depend on proper hydration.
- Keep your body hydrated by drinking lots of water. It will support general skin health and healing.
- Lips that are properly hydrated are less likely to develop dryness and flakiness.
6.Do Not Eat Hot and Spicy Food:
It’s advised to avoid eating hot and spicy foods for the first few days after receiving a blush lip tattoo.
- They can make you uncomfortable and slow down the healing process.
- To promote a speedy recovery during this time, choose colder, milder foods.
7.Follow the Instructions Given by Your Artist:
Every tattoo artist has specific guidelines and advice for aftercare.
- Stick to their instructions and any extra measures or safety precautions they suggest.
- To get the greatest outcomes, your artist’s knowledge and directions are essential.
Lip Blushing Cost
The lip blushing cost can vary between $200 and $1000 in Orlando. Prices may differ depending on the reputation, location, and experience of the artist. In order to get reliable and pleasing results, it is important to select a reputable artist.
You can speed up the healing process and maintain the look of your lip blush treatment with the help of these aftercare instructions. You’ll have gorgeous, natural-looking lips for years to come with the right care regimen.
How Long Does Permanent Lip Blushing Lasts?
If you are considering getting permanent lip blushing, you may be wondering how long the results last. The truth is, it all depends on the individual and the quality of care you provide to your lips.
In this blog post, we will answer your questions about the longevity of permanent lip blushing and provide tips on how to keep your lips looking their best. Read on to find out more!
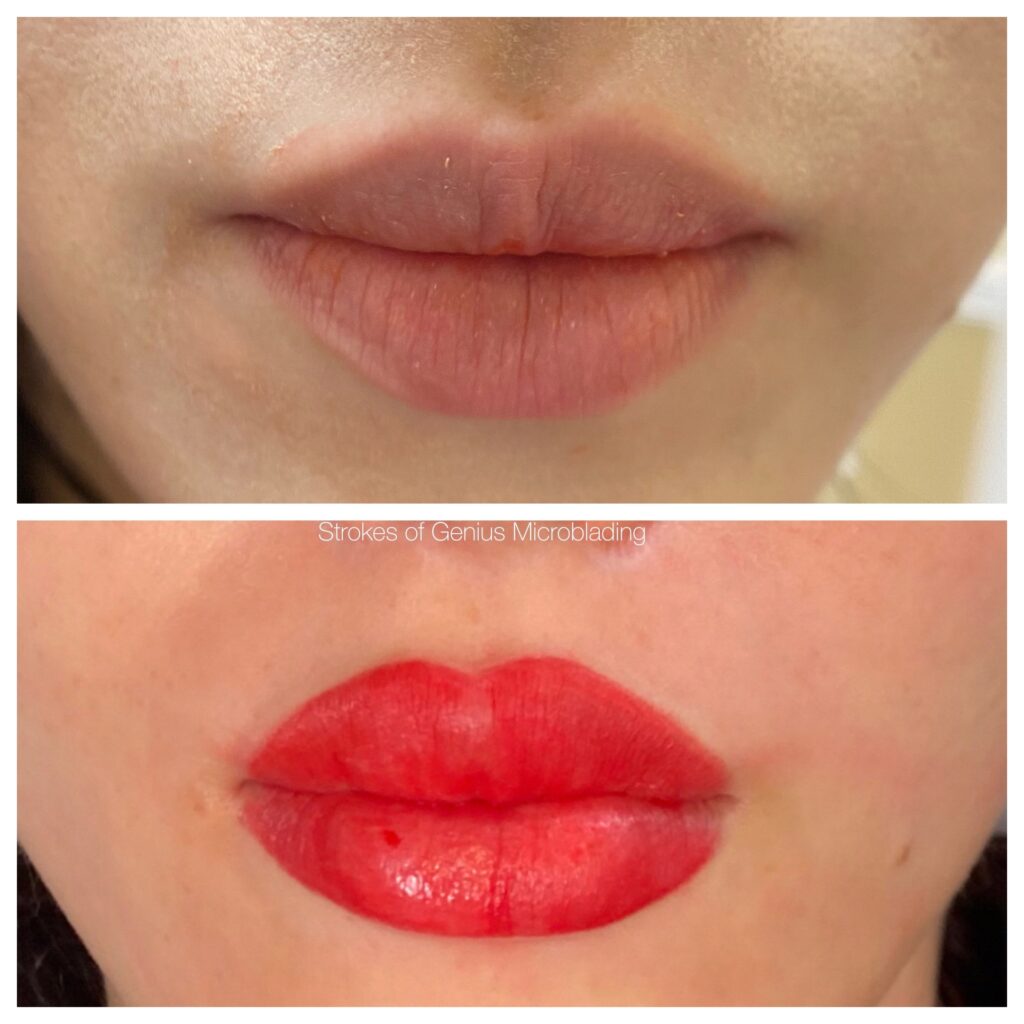
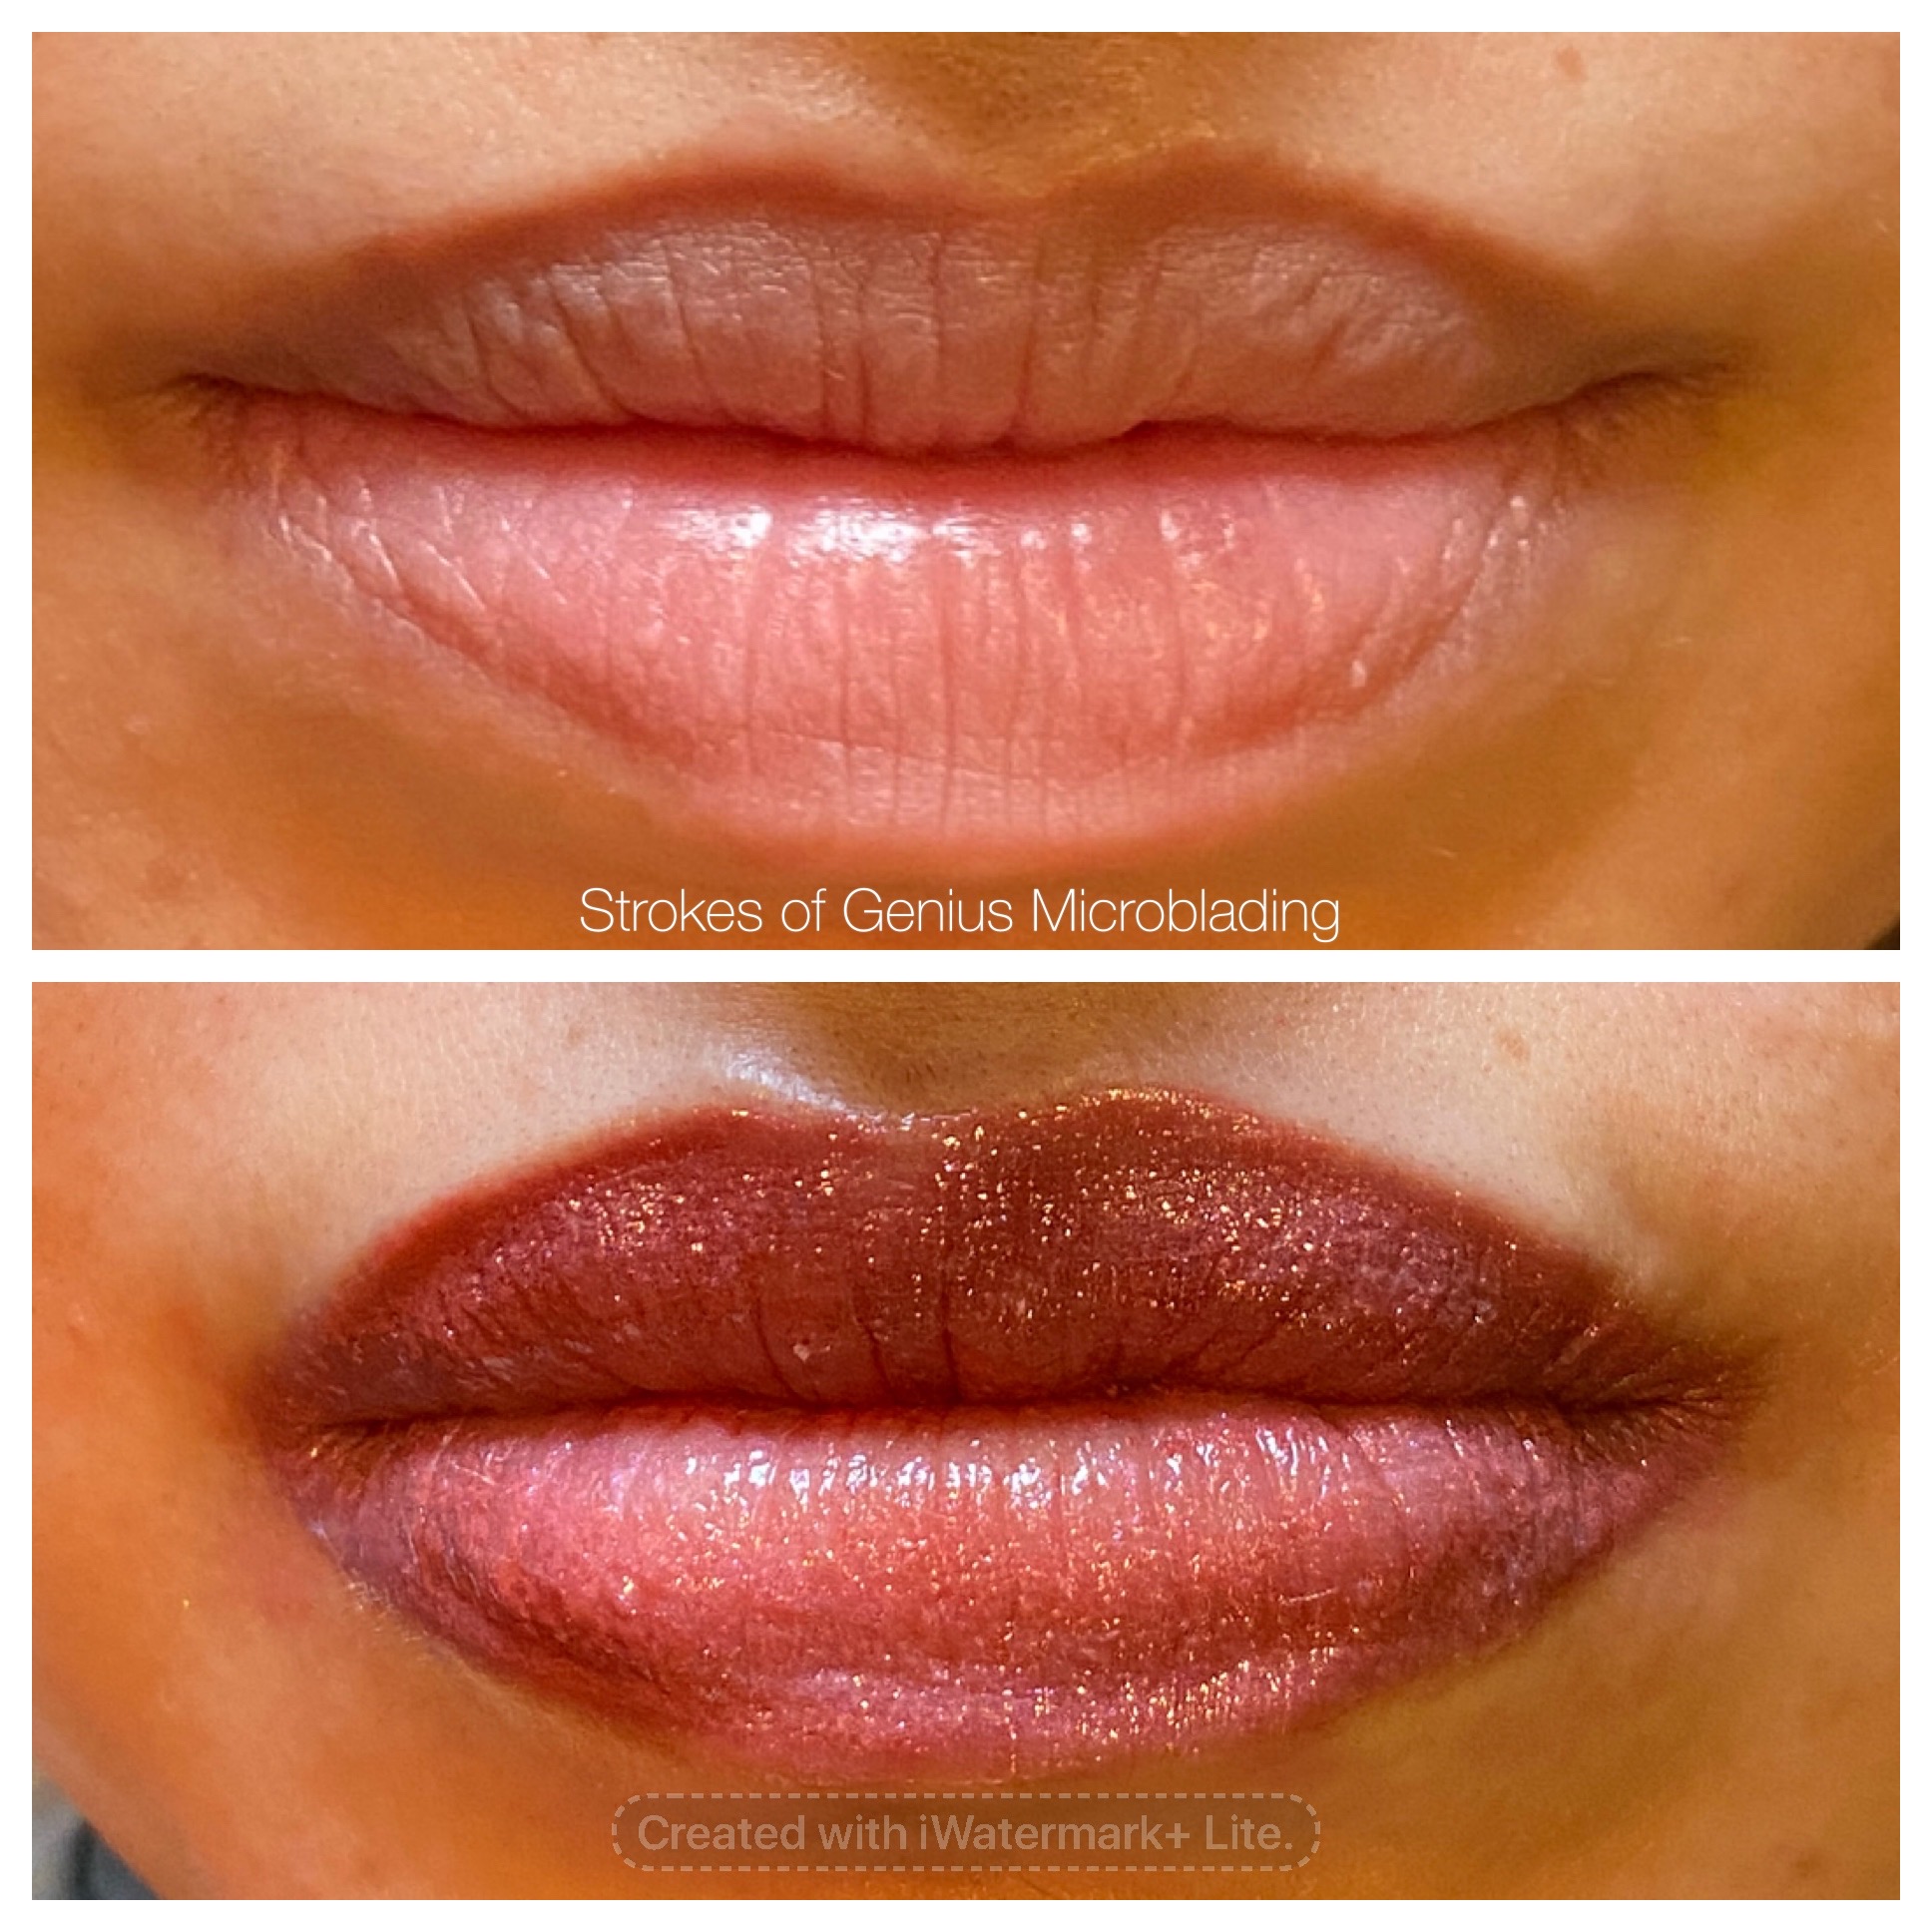
What is permanent lip blushing?
Permanent lip blushing is a semi-permanent tattooing technique that can help to enhance your natural lip color and give your lips a fuller and more defined appearance. It is a popular beauty treatment that many people are considering as an alternative to lip fillers.
Permanent lip blush is growing in popularity as it provides a more subtle look than traditional lipstick or lip liner. This method also gives people the freedom to customize the color and shape of their lips, making it a great option for people who want a more natural look or want to correct asymmetrical lips.
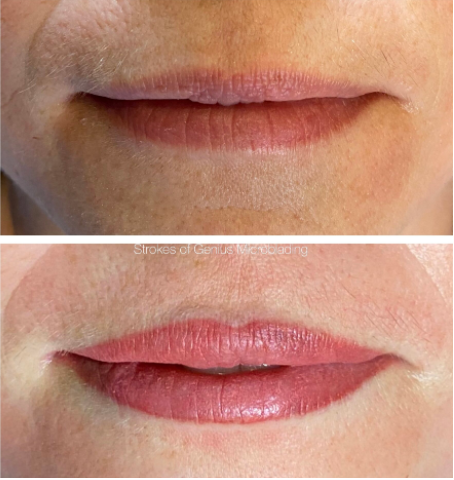
How Long Does Permanent Lip Blushing Last?
Permanent lip blush is a popular cosmetic procedure that gives your lips a beautiful, rosy hue. The color can last up to two years if properly cared for and maintained. With the right products and care, you can keep your lips looking beautiful for many years to come.
The longevity of your lip blushing depends on a variety of factors, including the quality of the product used, how well you care for your lips afterwards, and your natural skin tone and texture. While some people may find their lip blushing fading after a year or less, others may find theirs lasting two or even three years with proper care.
Tips for Maintaining Permanent Lip Blush
No matter how long your permanent lip blushing lasts, there are certain things you can do to keep your lips looking their best. Here are some tips for keeping your lip blushing looking vibrant:
- Avoid using abrasive skin care products: Harsh scrubs, cleansers and exfoliants can irritate the delicate skin around the lips, which can cause your lip blushing to fade prematurely. Instead, use a gentle cleanser to wash your face and use a lip balm with SPF protection.
- Limit your exposure to the sun: Sun exposure can cause the color from lip blushing to fade prematurely, so it’s important to limit your time outdoors and wear a hat when you’re out in the sun. Additionally, make sure to apply sunscreen to your lips before you go out into the sun.
- Use a moisturizing lip gloss: Lip gloss can help protect and hydrate the skin around your lips, which can help prevent fading of your lip blushing. Choose a formula that is light and non-greasy, as heavy formulas can clog your pores and lead to irritation.
- Take care when eating: Acidic foods like tomatoes and citrus fruits can strip away the color from your lip blushing, so it’s important to be mindful of what you’re eating. Also, avoid licking your lips as this can also cause fading.
By following these simple tips, you can help keep your lip blushing looking vibrant for longer. Additionally, if you notice any signs of fading or irritation, contact a professional for advice on how to best take care of your lip blushing.
How Should I Prepare For My Saline Tattoo Removal Appointment?
If you don’t like your tattoo anymore or there is any mistake in your tattoo you can lighten and remove it. This isn’t a big deal as a safe and effective procedure is available known as Saline Tattoo Removal.
In this removal process, the experts penetrate the skin with a saline solution (salt+purified water) to break up the tattoo pigment and pull it out of the skin. Instead of injecting ink underneath the skin like in tattooing and microblading, the experts pull it out. This is a reverse process.
The saline tattoo removal process is effective. But, before you come for the appointment, you should prepare yourself. Your preparation will increase the success rate of the procedure.
What should you do?
Go for a patch test, if the artist says
A patch test is for your safety. It defines if your skin will accept the removal solution. The patch test becomes important if you have any allergies or a darker skin tone. It’s because darker skin tones have a higher risk of hyper/hypo pigmentation.
When the dark tone skin breaks during the procedure, it turns much darker or lighter than your normal tone. You should book this patch test a day or two before your main appointment day.
Seek a doctor’s consultation
Saline tattoo removal is safe. But, if you have a serious medical condition, you should seek a doctor’s consultation. This becomes more important if you are regularly under a doctor’s supervision and take medications that are not safe for the process.
The doctor will check your condition and advise you on the procedure. Sometimes, the doctor recommends delaying the process if any issue is found. It’s better to bring a letter from your doctor and inform the tattoo removal artist before the procedure.
Avoid going out frequently during the daytime
Sun tan is not good for the procedure, especially in the area that has to be treated. The tanned area creates a problem during the procedure as the shades of the tattoo are not visible properly. Sometimes, the procedure can take a wrong turn on the suntanned skin. So come to the procedure without a tan.
To prevent this, you shouldn’t go out frequently during the daytime. You should prefer doing your chores after the sun sets. If it’s important, you should apply sunscreen all over your body. You should start this routine 2 weeks before your appointment day.
Wear loose clothes for the appointment
We advise you to wear loose clothes during the saline tattoo removal so that you are comfortable. When the tattoo is dark, the procedure takes time, making it difficult for you to sit for hours in tight clothes.
Other than this, tight clothes create problems during the procedure as well. Your movement gets restricted and it becomes challenging for the artist to reach the tattooed parts. Thus, the procedure time increases.
With these preparation tips, we are sure the result of the saline tattoo removal procedure will be as expected. Also, you will not face any problems during and after the procedure.
Saline Tattoo Removal: Healing Timeline and Aftercare Procedure
Tattoos are one of the most creative ways to express ourselves. You may have liked the ink when you first got it, but for whatever reason, you want it removed now. With so many tattoo removal methods available, it’s easy to become overwhelmed. When it comes to tattoo removal, there are several factors to consider, such as the cost of removal, the method that hurts the least, and protection from scarring and pigmentation. Saline Tattoo Removal can be your saviour here!
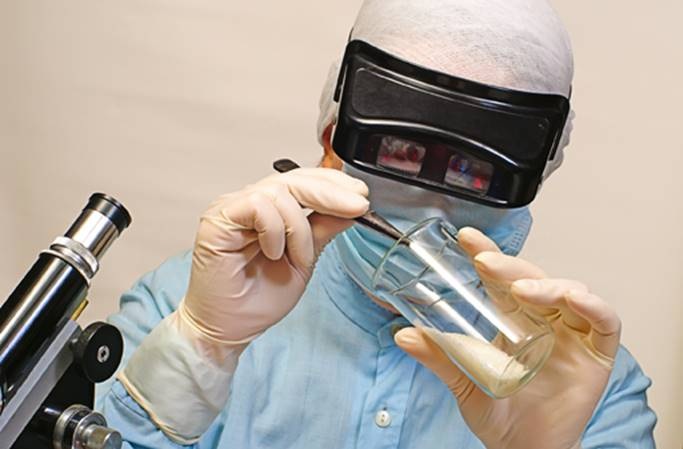
Tattoo removal is accomplished with a properly produced saline solution like A+ ocean and a coil or rotary tattoo machine in this procedure.
The Procedure:
The artist will go over the tattoo in the same way it was performed, but instead of ink, the produced saline solution will be implanted into the skin. Because the solution is hypertonic, the pigment is drawn to the skin’s surface. With laser treatments, fading and eradication will take multiple sessions. Typically, it takes an expert no more than 30-45 minutes to complete a task with saline tattoo removal procedure.
The Safest Option
When Saline Tattoo removal is done in the same way the tattoo was applied, with a natural, non-toxic, non-acidic solution like A+ ocean, the chances of skin and bodily harm are reduced in contrast to other techniques.
Saline removal is the most secure and healthy way of tattoo removal.
Prepare For Your Appointment
A patch test is not often required for removal. The only exception to this is if you have allergies or a darker skin tone. Darker skin tones are more prone to hyperpigmentation. This means that when the skin is broken, it might become substantially darker or lighter than normal.
- Do not go for a tan for several weeks before your visit
- Do not exercise on the day of your treatment.
- You must avoid Retin-A or Retinols for 7 days before your appointment and refrain from using them on or near the area for 30 days afterward.
- People who are pregnant or breastfeeding are not advised to receive this treatment.
Healing Timeline and Aftercare Process
The following is a timeline for the saline tattoo removal healing process:
On the day of your procedure: The affected area is painful and may feel burnt. It may appear red and bloated.
First several days: The region will scab over during the first few days.
One week later: The wound is still scabbed over.
Two weeks later: The scab has most likely fallen off two weeks later. As it heals, the skin remains pink or discolored and appears fragile.
One month later: The skin returns to normal.
Two months later: The region has ideally entirely healed and is ready for the next session.
- Avoid covering the area (unless you work in a place with a higher risk of infection, like a hospital).
- While the region heals, let it heal alone. It should not be washed or picked at.
- Lotions and soaps should be avoided.
- Keep the area away from direct sunlight.
- Avoid activities that produce sweating and submerging the affected area in water until the scab has entirely fallen off.
- Allow the scab to fall off naturally.
- After the scab has fallen off, apply vitamin E oil as suggested by your specialist.
If you want your tattoo to be removed, make an appointment with Strokes of Genius today to receive the professional Saline Tattoo Removal treatment!
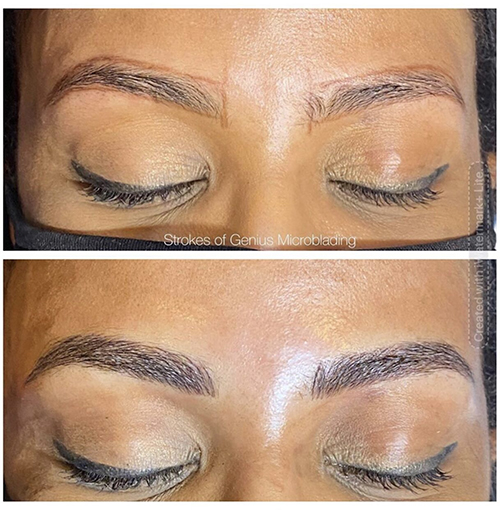
Is Shading with Microblading a Good Idea?
If you are also obsessed with having perfect brows, you might be thinking about microblading services. When searching for microblading services in Orlando, you might have come up with a microblading service that also combines shading and has just a few dollars difference in the price tags. This can put you in a dilemma whether you should go just for plain microblading or shading with microblading. To help you make a clear and informed choice, we have put together this guide for you.
Microblading
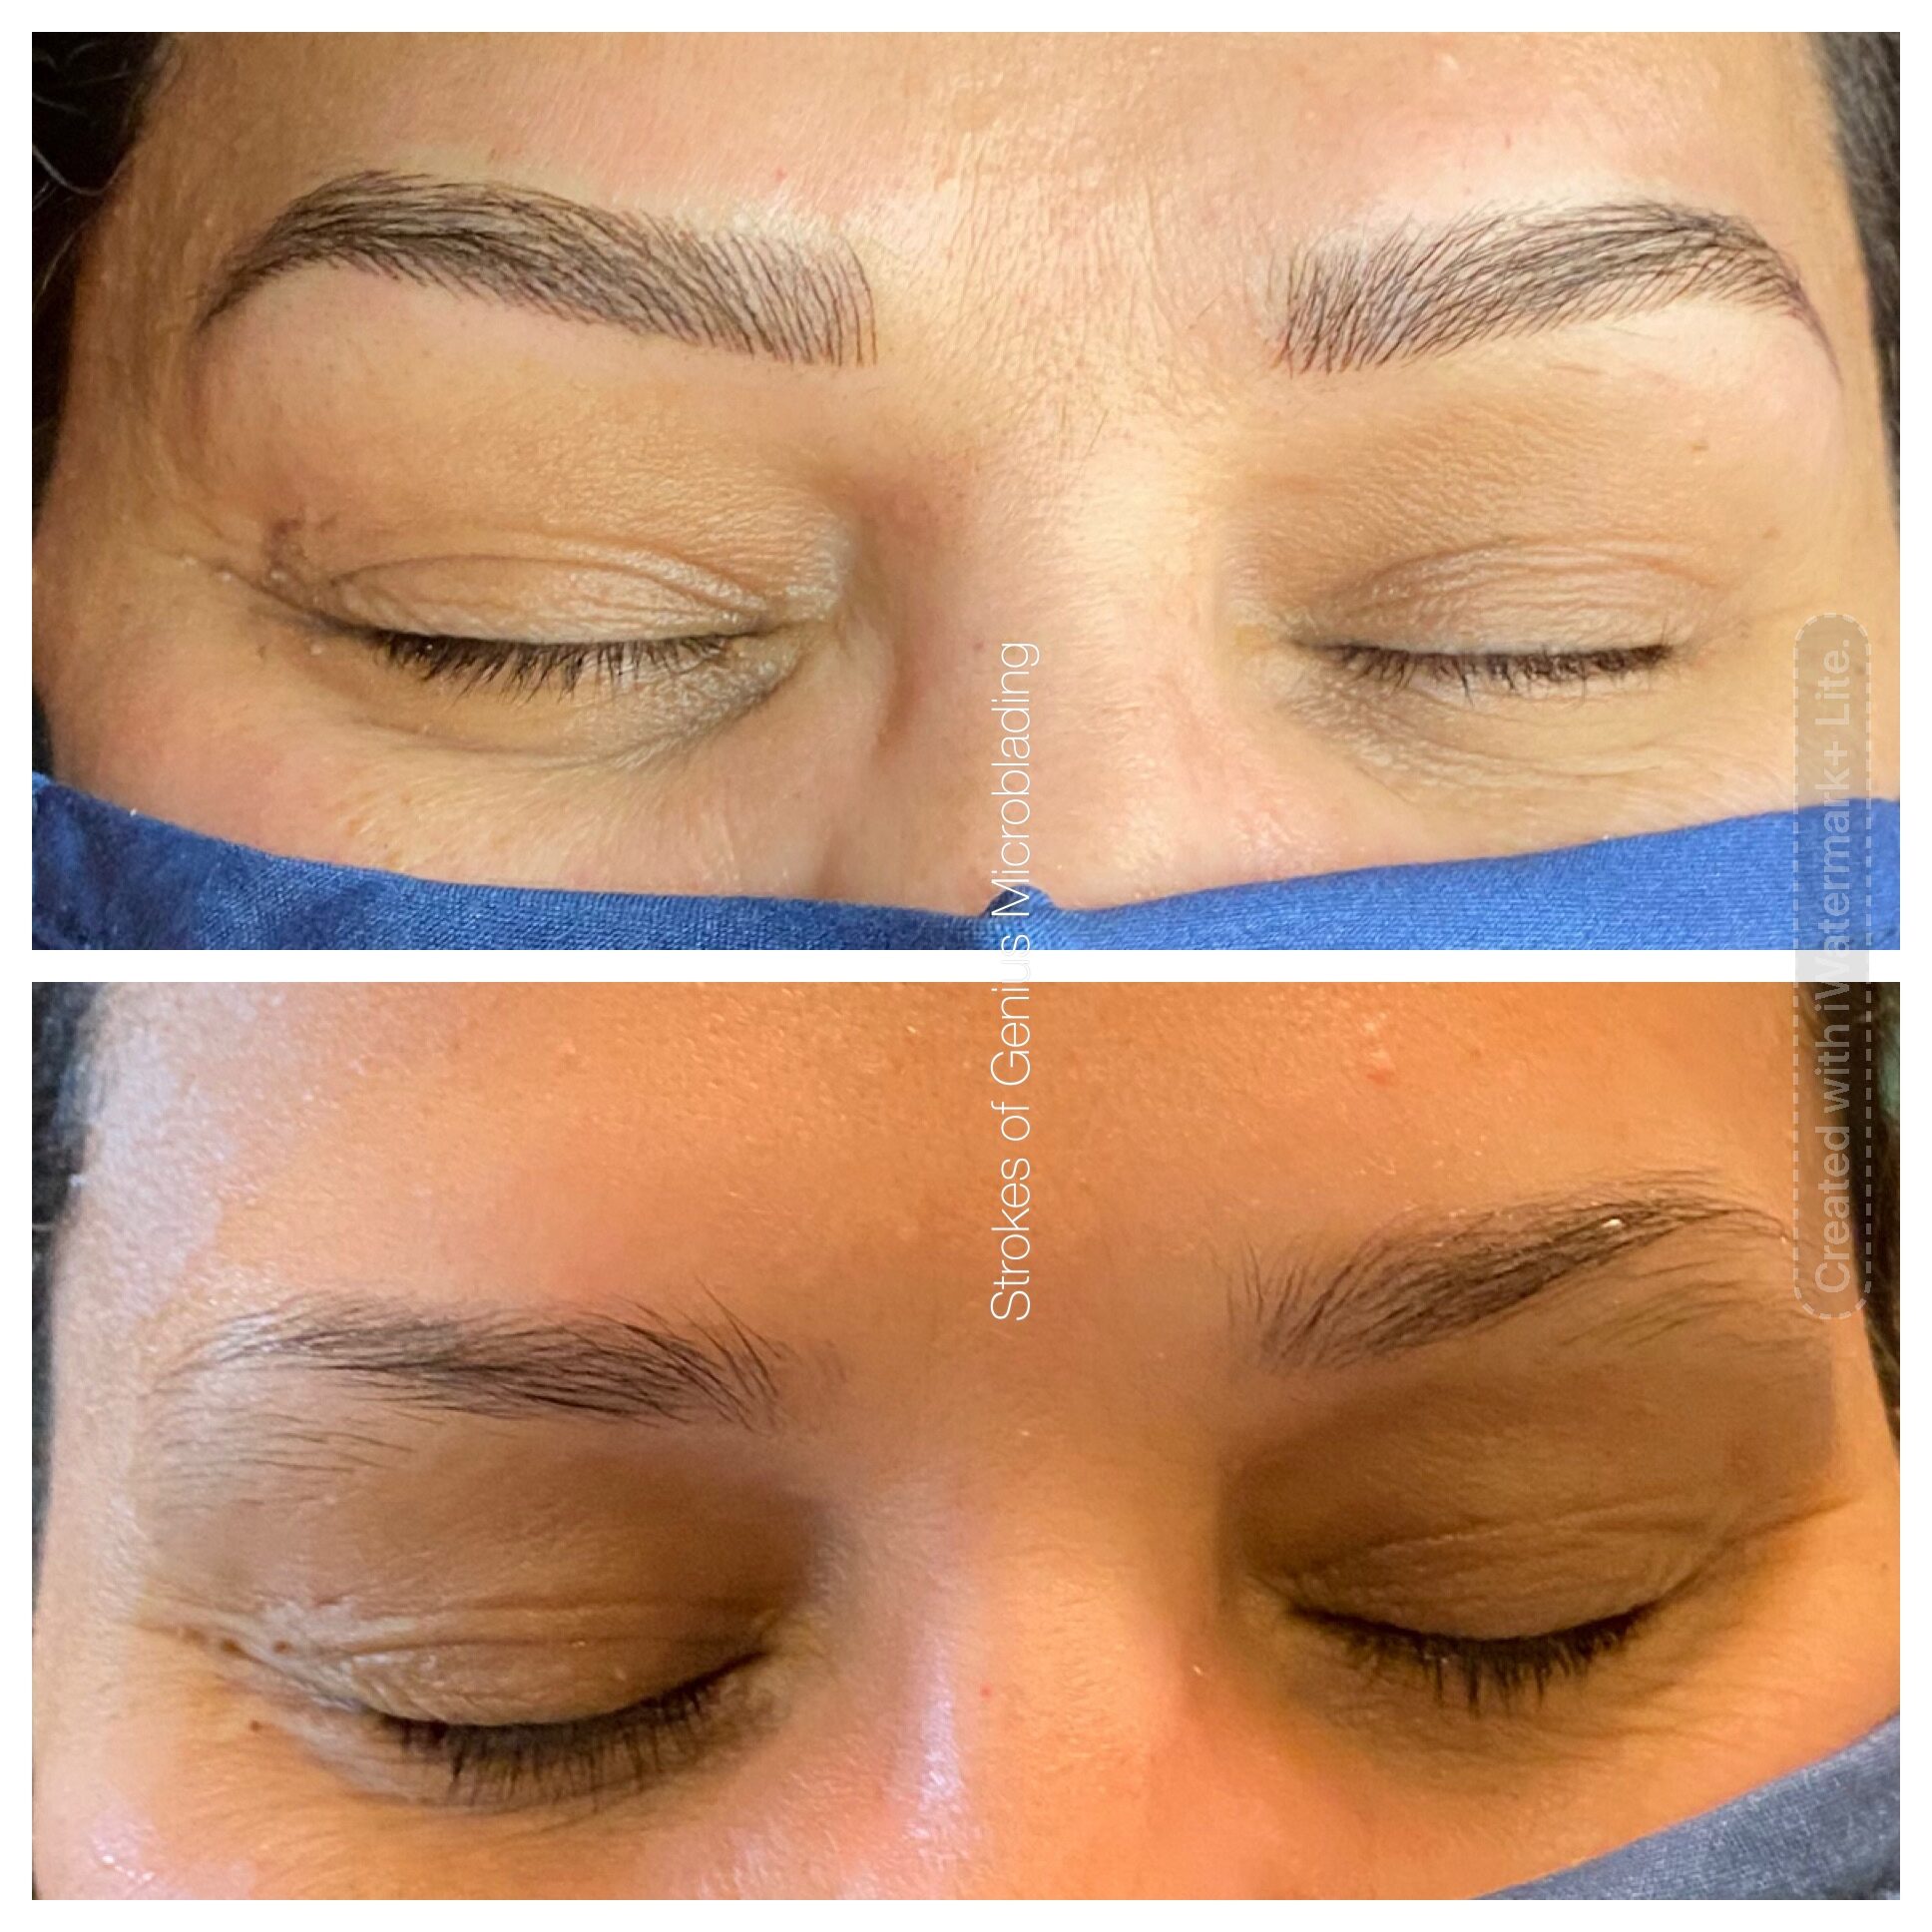
Microblading is a semi-permanent eyebrow tattooing technique wherein a certified and experienced microblading artist draws fine hair-like strokes on your eyebrows to give an illusion of fuller and more defined natural brows.
This technique is great solution for all those women who have thinner or sparse eyebrows. It can also help even the uneven eyebrow shapes. In other words, if you desire brows that look defined, more evenly shaped, and fuller naturally, microblading is your go-to choice.
Shading
Shading is another latest trend in the permanent (or semi-permanent to be precise) makeup industry. This technique gives your brows a soft-shaded, filled-in brow pencil look. Once it heals, it will look more natural than solid color. Shading gives your brows more depth and definition and thus, also makes a good choice. The color of shading can be customized. Thus, if you want to have light soft shading or bold-looking brows, it can be done.
Microblading vs. Shading: Which is better?
Microblading provides you with hair-like strokes that mimic the natural hair of eyebrows as compared to a penciled look. This process gives your brow hair strokes where there is no hair or involves drawing hair strokes to even the brow line, depending on your natural brows’ shape and your expectations.
On the other hand, shading, as its name suggests, involves shading the brow’s underlying skin so that your brow look more natural and a bit darker. For those who are looking for a made-up look, shading is often a better option.
Just like microblading, a good candidate for microshading should not have serious health issues or skin conditions. If you are pregnant or nursing, then you should postpone this procedure because both microblading and microshading require you undergoing a healing phase.
The best news is microshading can be done for all skin types, including oily. However, the period for which they will last depends on skin types, skin care routine, sun exposure, climate, lifestyle, and a lot more factors.
The pain level for both procedures varies from one person to another. To prevent discomfort, permanent makeup artists use a numbing cream.
Some pigments (or colors) fade quicker than other pigments. The lighter pigment you choose, the faster it will fade.
If you are someone who loves the look of fuller and filled-in brows, you should choose microblading and shading both. In case you are still in dilemma, schedule a consultation appointment for microblading services in Orlando at a reputable permanent makeup studio where they also offer shading service. They will help you decide which look goes best with your face.
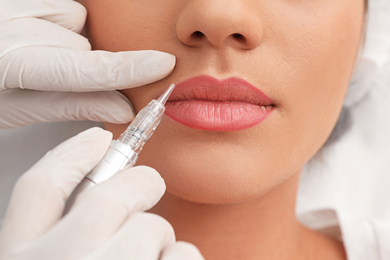
How to Prepare Yourself for a Lip Blushing Session?
Lip blushing sessions have been the hottest trend in recent years and have become the most sought-after cosmetic procedure of all time. This semipermanent cosmetic tattooing procedure involves injecting pigment into your lips with small needles.
However, you have to get ready for a lip blushing session before you actually go for it in order to get the most out of it. In this blog we’ll cover some ways that will help you prepare yourself for a lip blushing session and make sure you’re ready for all your future sessions as well!
Use Lip Scrub before the Session
A good lip scrub is an integral part of preparing your lips for a blushing session. Not only does it get rid of the dead skin, but it also increases blood circulation and removes excess oils.
So to use lip scrub before the session, wet your lips and rub in the scrub until you feel like you have some on all over your lips. Leave it on for about 30 seconds and then rinse off with water.
Avoid Applying Make Up
It is not recommended to apply make up before the session. This can lead to uneven pigments, skin irritation, and an unpleasant experience. If you are wearing make up, it is best to remove lips make up especially lipsticks before the session.
Remove any foundation or other products. Wash your face with warm water and pat dry your skin with a clean towel. Apply hydrating moisturizer if desired.
Use Lip Balms
It is recommended that you use lip balms as often as possible, especially before the session. This will ensure that your lips are always soft and hydrated.
If you have dry skin or if it is winter time, then you might want to apply a thicker layer of lip balm in order to avoid any cracks on the surface of your lips during the session.
Drink Plenty of Water
Drinking plenty of water is the most important thing you can do to prepare yourself for lip blushing. It will keep your skin looking fresh and hydrated, which in turn will make your lips look plumper.
You might need to get up every half hour or so at first, but you’ll soon find that you’re less thirsty and more focused on what’s going on with your lips.
Eat Before the Session
Make sure you eat something before the session. You may be hungry or thirsty after the session and this will help keep your energy up. Also the session might take 2-3 hours thus make sure you are full before the session.
Take Anti Virals
If you have had any cold sores or fever blisters in the past, it is important to take anti-virals prescription medicines like VALTRAX at least 2-3 days before your session. This will reduce the risk of getting an infection from the blusher.
Conclusion
In conclusion, keep your face relaxed and your lips moist during the lip blushing process. Prepare your body for the procedure by drinking a glass of water to hydrate your skin.
7 Reasons Why Saline Tattoo Removal Is Better Than Laser Removal
If you have any unwanted tattoos, then you probably know the struggle of finding an affordable and effective solution to getting rid of them for good. Most people typically decide between laser tattoo removal and saline tattoo removal, but what’s the difference between these two sessions?
While laser tattoo removal only affects the top layer of skin, saline tattoo removal gets to the ink deep under your skin, which results in fewer sessions, fewer side effects, and better overall results. To learn more about why saline tattoo removal is better than laser removal, keep reading!
More Effective
Saline tattoo removal has been shown to be more effective than laser removal, with greater accuracy and a better rate of skin clearing.
Laser removal can result in prolonged redness, blistering and burning; while saline tattoo removal is generally mild and includes less pain or discomfort.
Saline tattoo removal has been clinically proven to be more effective on tattoos that are newer than two years old and located in areas of low ink density.
Remove all Color of Ink
Saline tattoo removal can remove any color ink, including white which laser cannot remove. Unlike laser tattoo removal which can leave a scar if the tattoo is very dark, saline only leaves your skin feeling refreshed and hydrated once the healing is complete.
Less or No Pain
Saline also doesn’t require any pain killers or numbing creams, meaning there’s no recovery time like you would with laser removal.
Allows Re-Tattooing
One of the best benefits of saline tattoo removal over laser removal is that it allows you to re-tattoo the area. Re-tattooing with a related or nearby design can be an aesthetically-pleasing way to cover up an old tattoo, but also changes how someone feels about a past event. However, tattoos that have been removed by laser removal might not be able to be re-tattooed; hence, the person is left with no option.
Shorter Session Time
Compared to laser removal, saline tattoo removal sessions can be completed in a fraction of the time. The numbing process is generally quick and the artist should begin working on your skin right away. It takes relatively less time to remove a tattoo with saline solution. On the other hand, due to laser’s lengthy healing process, you may end up with multiple sessions.
Less Invasive
If you are looking forward for a less invasive method to get rid of unwanted tattoo, saline tattoo removal is the best option for you. Saline solution makes an ideal and better choice for its minimally invasive approach when it comes to removing tattoo ink, compared to laser.
Conclusion
Saline Tattoo Removal is a great alternative to lasers. If you are looking for the best tattoo removal solutions, you should consider saline tattoo removal, especially if you have dark tattoos or tattoos with hard-to-match colors.
Is Healing From Lip Blushing Treatment Difficult?
More than session, people are concerned about the lip blushing healing process. The session only takes 45 to 60 minutes. But, the healing process takes a week or more. So, people think this is the challenging part. But, the fact is lip blushing healing is straightforward. You just have to follow the aftercare instructions given by the artist strictly. Any carelessness during the recovery period will be harmful to you and impact the result of the session.
Stages of lip blushing healing process
For the first 24 hours, your lips will be fairly swollen, normally the swelling levels range from mild to moderate. This is why a patch test is done at least 24 hours before the appointment to ensure you aren’t allergic to the ink.
After 2-3 days, the swelling will reduce but the lip blush hue will get a bit darker than it was right after the procedure.
After 3-4 days, your lips will start to flake and scabs will begin to form to recover from the needle-induced wounds. This stage is very similar to that of a traditional tattoo. You shouldn’t peel off the scabs, no matter how tempting it is. This flaking or peeling stage lasts up to a week.
After 5-6 days, the flakiness will start to subside and the color of your lips will get 30 to 50% lighter than they were during and immediately after the session. The pigment might disappear but you shouldn’t worry as it will return a couple of weeks later.
This is what the healing process of the lip blushing session looks like. If you are worried about swelling, you shouldn’t because it’s very common after any cosmetic session. During the session, the tiny wounds provoke your body’s inflammatory response. And thus, your lips begin to produce lymphatic fluid immediately after the session, causing swelling.
What are your responsibilities during the lip blushing healing period?
If you are very much concerned about lip blushing healing, you should follow a few dos and don’ts. These things will surely make the process easy for you.
Things to do:
You should use ice packs to reduce swelling. This will eliminate your discomfort as well as work faster on the swelling. Other than this, you should keep your lips using SPF lip balms. This will reduce dryness and flakiness. Most importantly, you will not be tempted to remove scabs. You need to understand that picking scabs will reopen wounds and make you more susceptible to infections. Most importantly, you should be consistent with your washing and lip hygiene routine.
Things not to do:
You should refrain from activities or using products that could irritate your lips. It’s because lip blushing leaves open wounds that are vulnerable to infection. You should avoid sun exposure, intense exercise, swimming, saunas, and any sweat-inducing practice. Other than this, you should skip spicy food, soups, and hot beverages for at least 48 hours after the session. Also, you should prevent eating acidic, oily, or salty food items and drinking alcohol. Lip makeup should also be avoided.
Lip blushing healing is not as challenging as it seems. Or you can say it’s nothing compared to other facial sessions. You just need to understand the stages and follow the aftercare instructions given by your artist.
Can Saline Tattoo Removal Reverse the Result of Microblading Procedure?
Microblading is a procedure in which ink is injected underneath the skin to give the impression of an eyebrow and saline tattoo removal is a procedure in which tattoo pigment is pulled out. This is one solid reason that proves that saline removal can reverse the result of the microblading procedure. If something is injected, it can be pulled out easily and effectively.
A detailed explanation of how saline tattoo removal works on microblading
Before starting the removal procedure, the artist apply numbing cream in the session area to minimize the pain followed by sterilization.
A tattoo machine is used in the saline tattoo removal procedure. As saline solution is deposited it helps remove the pigment.
The solution then breaks the pigment and pulls it out from the outer surface of the eyebrow skin. This is known as the osmosis process. After extraction, the wound heals into a scab. And after the scab falls, the microblading eyebrows start getting lighter. The lightening process takes time, about 4-6 weeks, depending on the skin type.
Will the result of the microblading procedure reverse after one session of saline tattoo removal?
Not necessary. The number of saline tattoo removal sessions depends on different factors. Your artist will determine this once your skin gets healed after the first session. The result of the first session will help the artist to know the effectiveness of the procedure and plan out the next step.
Why is saline removal better than laser removal for eyebrow tattoo removal?
With lasers, eyebrow tattoo removal is a risky business because, in addition to removing the tattoo it can remove your hair as well. You might lose your natural eyebrows forever along with pigmented eyebrows.
On the other hand, your natural eyebrow hairs will remain intact and the pigmented eyebrows will vanish with the saline solution. The best thing about saline tattoo removal is that you can get your eyebrows re-tattooed once your skin gets healed after the removal procedure.
In laser removal, re-tattooing is impossible because the procedure is intense and often leaves shiny skin or scar tissue behind.
Who is eligible for a saline eyebrow tattoo removal procedure?
You were eligible for eyebrow microblading doesn’t mean you will be eligible for saline tattoo removal, even though the process is almost the same.
To get your eyebrow tattoo removed, you should have patience and plenty of time at hand. Also, you should be willing to follow aftercare instructions. You should give enough time to the treated area to heal and shouldn’t rush to re-tattoo or apply makeup.
If you want immediate results, you are not ideal for saline tattoo removal. Other than this, you should drop the idea of removing eyebrow tattoos if you have any severe skin or health conditions that can prolong healing.
Is saline tattoo removal safe for eyebrow tattoo removal?
Yes, saline tattoo removal is safe but only if it is performed by an experienced artist and all aftercare instructions are followed strictly and carefully.
Saline tattoo removal can reverse the result of the microblading procedure. So, book your appointment today